A job recurrence allows a job to be created periodically (e.g. one a month). This is useful to ensure regular jobs are created automatically when required.
In order to create a job recurrence in Velappity the user must click on the “Job Recurrences > Create” menu. In Velappity, the Job Recurrences feature allows you to repeat jobs for a set period of time (e.g. a year).
Once the “Create” heading has been clicked, the page shown below should be displayed.
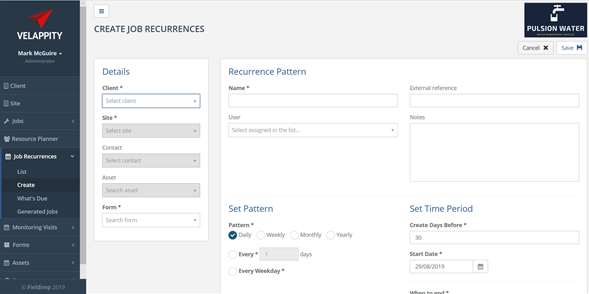
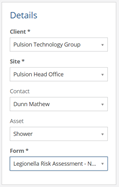
On the left-hand side of this page, the user can enter the details of the job recurrence. These details include which client the job recurrence should be associated with. This can be selected from a dropdown menu of all previously created clients. The site that the job recurrence will be associated with can also be entered here by the user. This can be selected from the list of previously created sites using the dropdown menu.
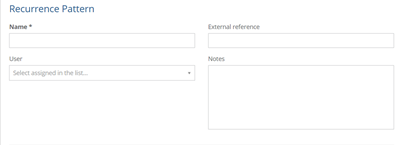
Once the user has filled out the “Details” section, they can then move on to filling out the section on the right-hand side of the page labelled “Recurrence Pattern”. The user can first enter the job recurrence name. This is a required field and must be a string value. This name will be displayed in the list of job recurrences so the recurring job can be identified (e.g. quarterly tank cleaning or annual risk assessment).
The individual that is being assigned to the job recurrence can also be selected from the dropdown box labelled “User”. An external reference can also be entered to identify the job recurrence. This must be unique from other external references within your organisation. However, it is not a required field. Some notes about the job recurrence can also be added by the user in the textbox labelled “Notes”, but this is also not a required field.
The user must also at this point specify the pattern that they wish for the job recurrence to follow. The pattern section of the job recurrence creation is described below.
The user has the option to set the pattern of how often the job will recur. They can do this through the “Set Pattern” section on the right of the page where the user should select one of the four checkboxes which offer the options of daily, weekly, monthly and yearly. If the user selects the daily option, they will be met with the following decisions to make:
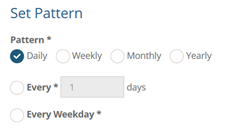
The user must decide whether they want the job to occur every weekday, or at intervals of a certain number of days. The user must also select the start date for the job recurrence. If the user selects the weekly option, they will be met with the following decisions to make:
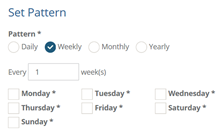
The user must decide how many weeks they wish for between every recurrence and select which days they wish for the job to be done on. The user can do this by ticking the checkboxes of the days where they wish for the job to be executed and leave the ones where they do not want the job to be executed blank. For example a pattern can be set up weekly, every 2 weeks on a Monday which will schedule the job fortnightly on a Monday. The user must also enter the start date for when the job recurrence will start.
If the user selects the monthly option, they will have the following decisions to make:
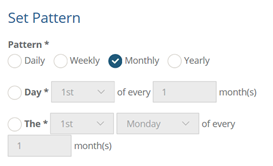
The user must decide whether they wish the job to recur on a certain date of the month at a user specified interval or whether they wish for this to happen for a certain day for months with an interval. An example of this would be setting it to be the 2nd Tuesday of every 7th month. The user must also specify which date that they wish for the job recurrence to begin. If a date is set which does not occur in every month, for instance the 31st, the date the job occurs will default to the last day of the month.
If the user selects the yearly option, they will have the following decisions to make:
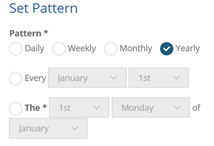
The user must decide whether they wish for the job to recur on a certain date every year or a certain day. An example of a certain day would be the 2nd Tuesday of November every year. The user must also specify the start date for the job recurrence.
After the user has completed this section, they should then move on to filing in the “Create Days Before” field in which an integer value can be placed. This is a required field and represents when the actual job is created. This can help with planning cycles to plan and allocated work. After the user has filled in this section, they can then fill in the final section of the page. This is the section marked “When to End”:
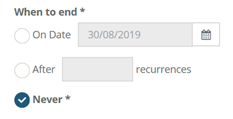
In this section, the user must specify when they wish for the job recurrence to end. The user can choose between specifying a date for the recurrence to end, specifying a certain number of recurrences which must pass before it ends and specifying that the job recurrence will never end.
When all of the information on this page has been entered, the user can click the “Save” button at the top right of the page to finalise the creation of the job recurrence. Alternatively, the user could select the “Cancel” button at the top right of the page which would terminate the creation of the job recurrence.
![]()
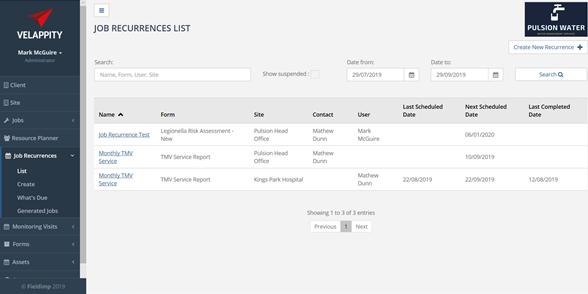
If the recurrence is saved then the following page will appear to the user:
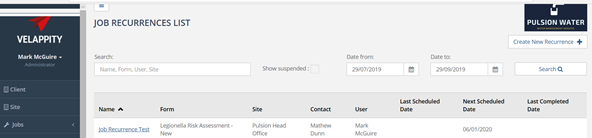
As can be seen above, the created job recurrence now appears in the job recurrence list.
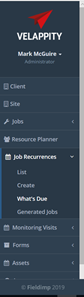
It is also possible for the user to see when job recurrence jobs are due. The user can do this by clicking on the “Job Recurrences” heading, followed by the “What’s Due” subheading:
The user will then be taken to the following page:
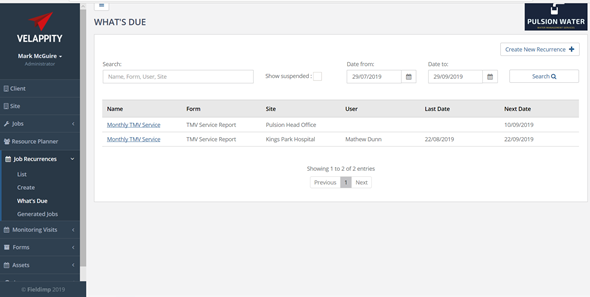
The user will then be able to view the different job recurrences to see when they are due by pressing on their link in the “Name” column.
Editing a Job Recurrence
In order to edit a job recurrence in Velappity, the user must direct themselves to the “Job Recurrences List” page, to do this, the user must press on the “Job Recurrences” heading, followed by the “List” subheading:

The user will then be taken to the following page:
To edit a job recurrence, the user must click on the link in the “Name” column for the specific job recurrence that they wish to edit:

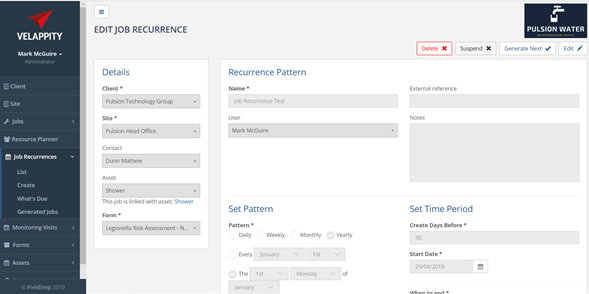
The user will then be directed to the page for that specific job recurrence. The user will be able to see a variety of buttons at the top right of the page:
![]()
The “Delete” button will delete this specific job recurrence. The “Suspend” button will halt the job recurrence, meaning that the job recurrence will not create jobs when it is supposed to. The “Generate Next” button will allow the user to create the next job that is due to be created by the job recurrence prematurely. Then the “Edit” button will allow the user to edit the job recurrence page. To edit the page the user should press this button. Once the user has clicked on this button, the user will be able to edit data in the job recurrence page. Please note that some parts of the page will not be able to be changed.
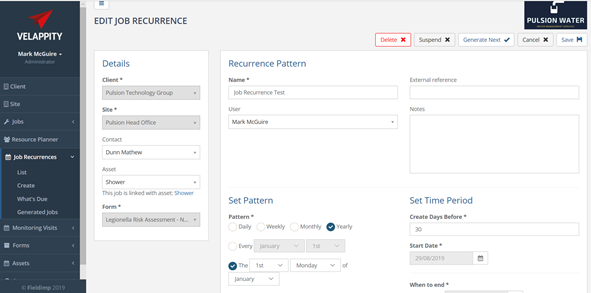
If the user is unsure on what any of the fields on this page means, the user should look at the “Job Recurrences” section in this document. Once the user is happy that all of the information is correct, the user can click on the “Save” button at the top right of the page.