An Asset is a piece of equipment upon which inspections or tests are performed. Generally, in a compliance regime, an Asset Type is used to categorise assets. For example, an asset type could be fire extinguisher, and there may be many fire extinguishers (Assets) on the site i.e. fire extinguisher 1, fire extinguisher 2. Asset types are used to determine which inspection test is relevant when creating an asset on the site. For example, an inspection test may check that the pressure within a fire extinguisher is within parameters and this test may be performed quarterly on all assets of asset type fire extinguisher. Before creating an asset, a corresponding asset type must be made.
Creating Asset Types
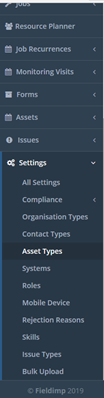
Asset Types define the class of asset when an asset is created (e.g. Hot Water Tap, Shower, Cooling Tower or Electrical Panel). Asset types group assets together so that particular tests can be run against them. For example, you can set up tests, see later, to be performed on all assets of a particular asset type. To create an Asset Type, the user must select the “Settings > Asset types” menu :
Once this is clicked, the user will enter the “Asset Types List” page:
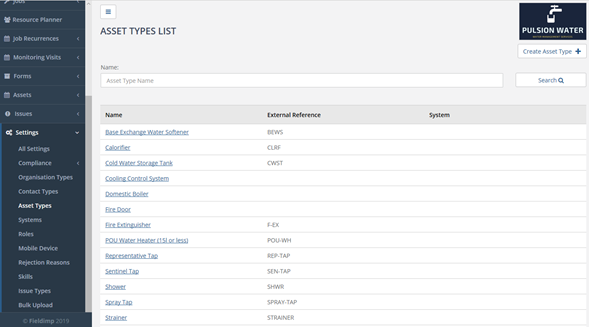
On this page, the user is able to see all of the asset types that have been created. As well as being able to create, edit and delete the asset types.
Clicking the “Create Asset Type” button displays the “Create Asset Type” page:

The user should enter the name of the asset in the “Name” field, for example Fire Extinguisher or Hot Water Tap. The user can also include a brief description for the asset type if they desire in the “Description” field. The “External Reference” field is a unique string of letters and/or numbers which uniquely identifies this asset type for external use (this is often used for integration with external systems).
The user can also determine whether or not the field is “Representative” for more information on this please see the “Representative Outlets” section below.
The “System” field includes the system that the asset type belongs to (see the “Creating a System” subheading in the “Compliance Module” heading if the user is unsure as to what this is / wishes to create a system). Once the user is happy with the inputted information the user must click the “Save” button at the bottom right of the page to save the asset type, meaning that it will not be able to be seen in the asset type list and be able to be used when creating assets.
![]()
Clicking the asset type name will take the user to an edit page, where the user can edit or delete the asset type:

Note that an asset type CANNOT be deleted if it has assets of this type within Velappity.
Creating Assets
To create an asset, the user must click on the “Assets” heading, followed by the “Create” sub-heading:

The user will then be met with a prompt with a dropdown menu, asking for an asset type to be selected. Simply select the asset type that corresponds to this asset:
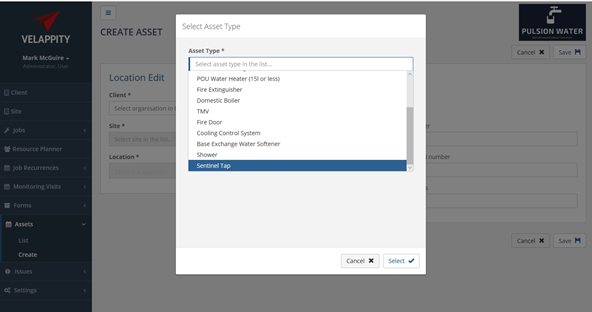
Following this, press the “Select” button to select the asset type. The “Create Asset” page will then be displayed.
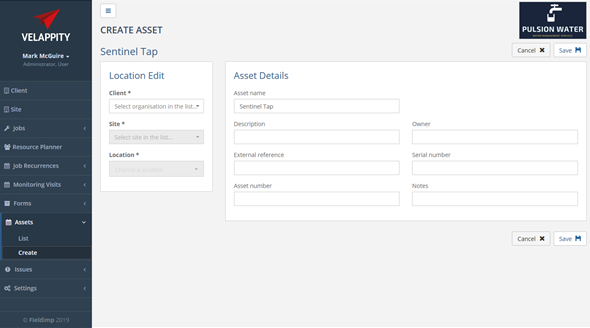
An asset will exist on a client site at a specific location (e.g. client could be Acme Ltd with the site being the London site and the location being the Plant Room).
On the left-hand side of this page, the user will be able to fill in details of the location of the asset through a series of dropdown menus. A Client, Site and Location should already exist before creating the asset (see the relevant sections on how to create a client, a site and a location.
From the “Client” dropdown menu, select the client that this asset belongs to. If this client is not in the dropdown menu, see the “Client creation” section in this document. For the “Site” dropdown menu, select the site of the client that the asset is located in. If the site is not in the dropdown menu, see the “Creating a Site” section in this document. For the “Location” dropdown menu, select the location in the site where this asset is located. If the location is not in the dropdown menu, see the “Creating a Location” section in the document.
On the right-hand side of this page, the user will be able to enter details on the asset. The “Asset name” field will have already been filled out for the user as this should be the asset type, however this will usually need to be edited to uniquely identify the asset. The “Description” field is a description of the asset, the “Owner” field is the owner of this particular asset. For example, an asset may be legally owned by the client or a third party and this ownership can be recorded here. The “External Reference” field is a unique string of numbers and/or letters that uniquely identifies the asset for external use.
The “Asset Number” field is the unique number given to an asset which helps it to be identified in the asset list. The “Serial Number” is another string of letters and/or numbers that can be used to uniquely identify an asset, this will be located on the asset. The “Notes” field is there if the user wishes to add any comments etc to accompany the asset.
Clicking on the “Save” button will create the asset.