In order to create a Site in Velappity, the user must be logged in and there must be at least one previously created client. This is because every site in Velappity must be assigned to a client. To get to the Create Site page, the user must click on the “Clients and Sites > Site > Create” menu.
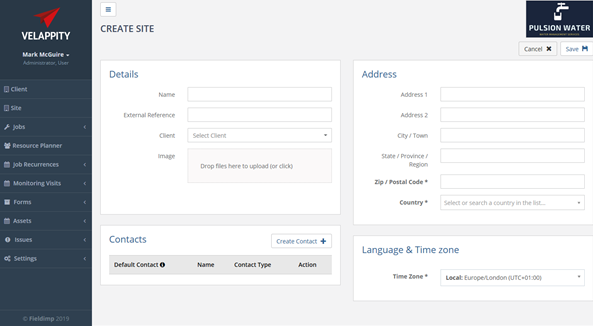
The user can add the details of the Client that the site is a part of. An external reference can also be entered for the site however this is not required. The external reference will be used to identify the site in external system integrations and therefore should be unique. The client that the site is a part of should also be entered. The client can be selected from a dropdown menu of all the clients that have been created on the user’s account. The user can also add an image of the site, address of the site and the time zone of the site.
The user can also add a contact for the site on this page. This can be done in the same way as when creating a contact for a client.
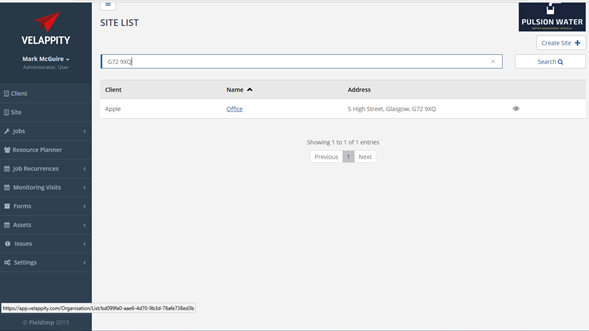
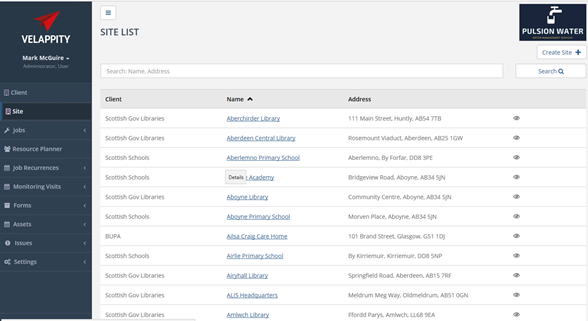
After the “Save” button has been clicked, the site should be displayed in the site list:
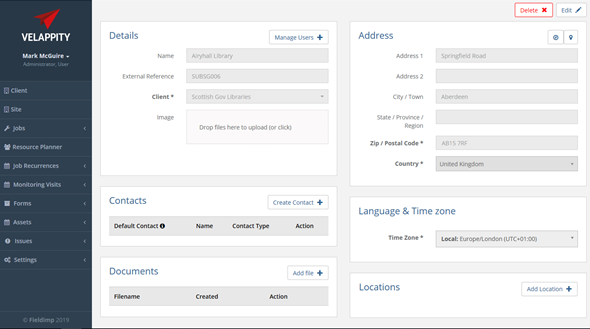
Clicking the site’s name will take the user to an “Edit Site” page, allowing them to view the site information in more detail. To edit the site details the user should press the “Edit” button in the top right of this page. The site can also be deleted from this page by clicking the “Delete” button in the top right.
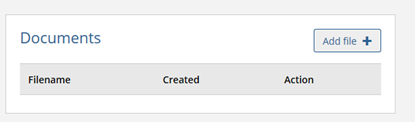
On the “Edit Site” page documents can be added to the site; these could be agreements, contracts etc. The documents section can be found at the bottom left of the “Edit Site” page:
The “Add file” button can then be clicked which will take you to an “add new file” section
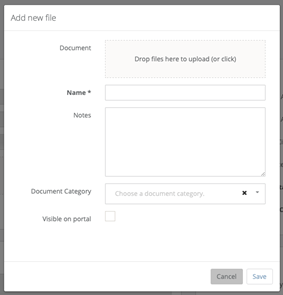
The “Document Category” field is any tags the user wants the document to have. The document will be displayed under these tags in the client portal. If there are no tags added, then the document will be under an ‘uncategorised’ tag. To create a new tag please see the “Document Categories” section of this guide. If the “Visible on portal” checkbox is checked this means the document will be visible to all users that have access to this site on the Client Portal.
The user can drag and drop documents into the “Document” field of the page and can give a name for the document. Once this has been done, the user can then either press the “Save” button to add the document to the client or press the “Cancel” button to cancel the addition of the file.
Creating a Location
A location is an area inside of a site. For example, there could be a Plant Room or Gents Toilet. These rooms would be classed as locations. In order for a location to be created, there must be a site that has already been created.
To create a location, the user must select a site from the “Site List” page.
Clicking on a site takes the user to the “Edit Site” page (shown below)
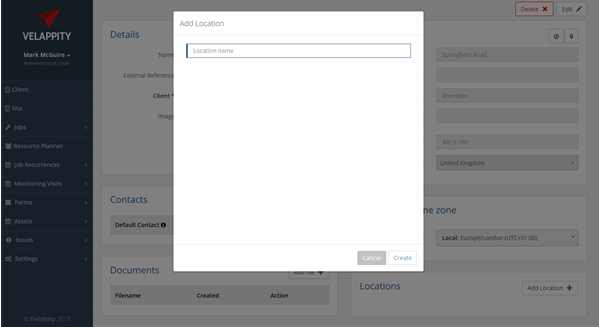
The user can then scroll down on this page to get to the “Locations” section of this page, which can be found at the bottom right of the page:
To add a location to the site, the user must press the “Add Location” button.
Once the user has clicked on this button, the user will then be able to enter the name of the location.