Creating a Job
In order to create a Job in Velappity, the user must be logged in and there must be at least one previously created client, site and form. This is because every job in Velappity must be assigned to a client and site and every job must be based off a form. To get to the Create Job page, the user must click on the “Jobs > Create” menu.
Clicking the “Create” sub-heading will direct the user to the page below:
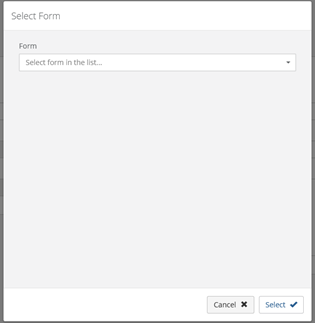
This page allows the user to select which previously created and published form that they wish to base their job on. The user selects the form using the dropdown menu. If the user is satisfied with the form selected, then they can click the “Select” button which will take them to the page displayed below. Alternatively, the user could “Cancel” button which would terminate the job creation process.

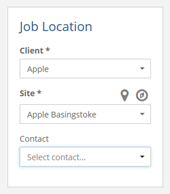
On the left hand side of the Create Job page under the heading of “Job Location”, the user can enter the client that the job will be associated with along with the site that the job will be associated with. These are all required fields and can be selected using the dropdown menus displayed. The user can also choose the contact within the client that the job will be associated with, but this is not required
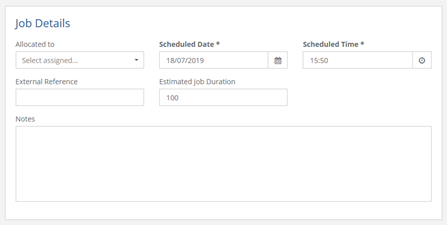
On the right-hand side of the Create Job page under the heading of Job Details, the user can enter the details of the job. These details include the individual within the user’s company that the job is being assigned to (i.e. a field worker within your organisation). This can be entered using the dropdown menu labelled “Allocated to”. The scheduled date and scheduled time for the job can also be entered in their respective fields. An external reference for the job can also be entered to identify the job. This is not required however if entered it must be unique from other external references within your organisation. The estimated job duration in minutes can also be entered along with any notes on the job that need to be entered.
When the user is finished creating the job, they can click the “Save” button to finalise the creation of the job. Alternatively, the user may click the “Cancel” button to cancel the creation of the job.
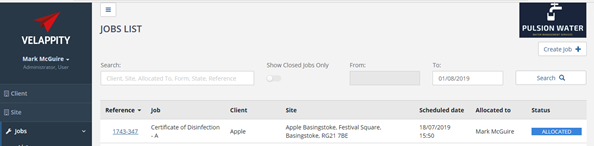
After the “Save” button is clicked, the user should be directed to the job list and the job should appear along with its details.
The user can then delete the job by clicking on the Job reference and clicking on the delete button on the top right of the Job page. To edit the job, the user must click on the job reference from the “Job List” page and then edit the job from there. Only jobs with a status of ‘new’ can be edited.
Job Status
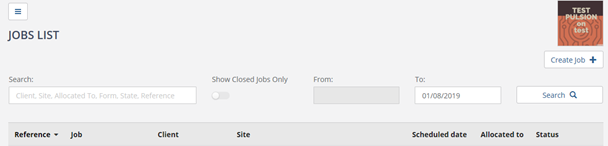
In the “Jobs List” page, it is possible to see the status of a job. This can be seen under the “Status” column:
Once a job has been created, the job status will be under “New”:
![]()
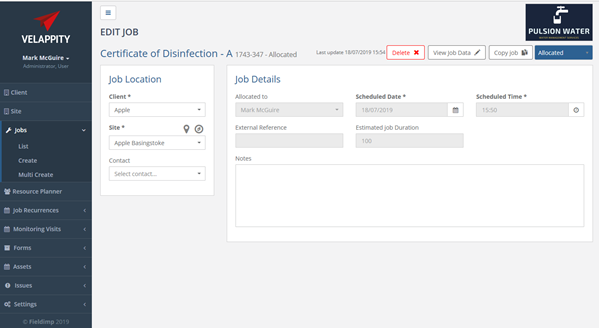
Once a job has been allocated to a user, the job status will be under “Allocated”:
![]()
This means that it has been created and is ready to be synced with the user’s device, see the “How to Sync the Device” sub section in the “Mobile Application” section.
When the user has downloaded the job to their device, the status of the job will be “On Device”:

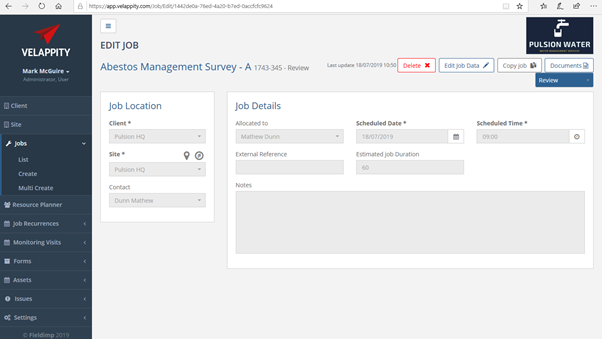
When the user has completed filling out the job on their device, the status of the job will be under “Review”:
![]()
This means that the job has been created, synced with a device, completed on that device and once again synced back to the web app. The jobs documents will be automatically created when the job is in the status. From this stage it is possible to complete the job.
To complete a job, the user must access the “Job List” page. From here, the user can look down the Job column in the table on this page to find their job that is under review:
Once the job has been found. Clicking the job reference number will display the job details.
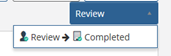
In order to Complete the job, the “Review” button in the top right must be clicked:
![]()
Once clicked, there will be a dropdown menu, which will allow the user to click on completed, the user should click on the “completed” button at this stage:
Job Documents
To view a jobs documents the user should press the “Documents” button on the “Edit Job” page. This button will only be visible if the job status is “Review” or “Completed”. The user will then be presented with a popup showing all the documents associated with this job.

There are four different status types a job can have. “New” means there is a document template available for this form type, but the document hasn’t been generated yet. To generate the document, press the “Generate” button. “Generating” means the document is in the process of being generated. “Failed” means something has gone wrong in the generation process, to retry press the “Generate” button. “Completed” means the document has been created successfully.
The user can also download the report as either a .pdf or a .docx file using the two buttons in the “Download” column. The “Visible on Portal” checkbox determines whether or not the document can be viewed by users on the client portal.
Using the Multi-Create Feature
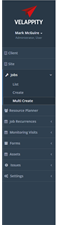
To create multiple jobs with the same form for a select number of clients or select sites for a client rather than manually creating many jobs using the create job feature. To do this, the user has to click on the “Jobs” heading, followed by the “Multi Create” subheading:
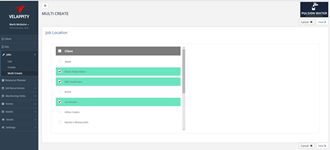
This will then take the user to the “Multi Create” page:
If the user wishes to create jobs for multiple clients, the user must click on the “Client” field, which will cause all of the clients to be selected (The checkbox will be ticked, and the field will be green):
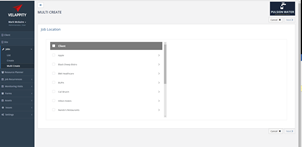
If the user wishes to create jobs for multiple clients, the user must click on the “Client” field, which will cause all of the clients to be selected (The checkbox will be ticked, and the field will be green):
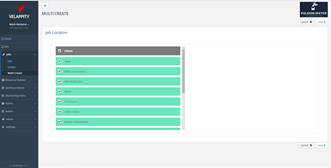
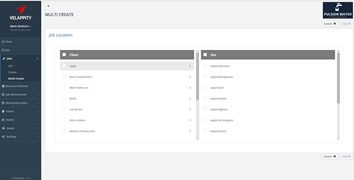
If the user decides against this, the user can click on the “Client” field again, causing all the clients to become unticked. To select multiple clients, the user can click on the checkbox to the left of that client. The checkbox to the left of this client should then be ticked and then the field for the client will be green. This can be done for as many clients as the user wants:
To create jobs for multiple, selected, sites for an individual client, the user can double click on the field for that client. Please take care as to not click on the checkbox for the client. Once the field for the client has been double clicked, a “Site” sub-page will open up within the “Multi Create” page:
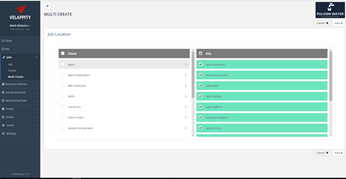
When on the site page for the selected client, it is possible for the user to select all of the sites at once by clicking on the “Site” field. This will cause all of the sites to be selected, this can be identified by a tick of the checkbox on the left of the site and the field of each site will be highlighted in green:
Please note that to unselect these sites, the user must click on the checkbox to the left of the “Site” field. To create jobs for multiple, selected, sites. The user is able to click on the client that is applicable to the sites. Then the user can individually select sites by clicking on the checkboxes next to the field of those sites:
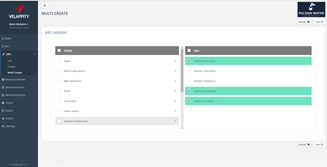
Please note that the user is unable to select individual sites from more than one client in this process.
Once the user is happy that they have selected the applicable sites/clients, to continue with creating the jobs, they must click on the “Next” button. However, if the user wishes to stop creating the jobs, the user should press the “Cancel” button.
If the user has pressed the “Next” button, the user will be taken to a “Job Details” page, where there will be a brief description of how many jobs the user is making and how many sites/clients the jobs are for:
![]()
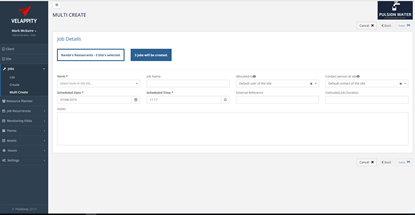
On this page, the user can then enter details of the jobs that will be created. The “Form” field is a dropdown menu field of all the possible forms that could be attached to this job, the user should select the applicable form for the jobs. The “Job Name” field is a title that the user wants to create for a job, the user can manually enter this, or the name will be based off the name of the form that the user has chosen.
The “Allocated to” field is who the job should be allocated to, however, when multiple locations are selected, only default users can be allocated to the job. The default user can be set when the site is created in the users section. However, this can be changed once the job has been created. The “Contact Person at Site” field is the point of contact at the selected location, however, when multiple locations are selected, only default users can be allocated to the job. However, this can be changed once the job has been created. The “Scheduled Date” field is the date that the job should be carried out and the “Scheduled Time” field is the time of day that the job should be carried out.
The “External Reference” field is a unique string of letters and/or numbers that will uniquely identify the set of jobs that are about to be created. The “Estimated Job Duration” field is a time that should be included if the user wishes to outline how long the job should take. The “Notes” field is there for any comments that the user may have about the jobs, these can be viewed on the device of the surveyor etc. If the user is happy that all the information has been entered correctly, the user can press on the “Save” button at the bottom right of the page. If they user wishes to go back a page to change anything on the previous page, the user should click on the “Back” button at the bottom right of the page. However, if the user wishes to discontinue with this process, the user can press on the “Cancel” button at the bottom right of the page.