To get to the “My Company” section, click on your name at the top left of the website:
![]()
Then, click on the “My Company” section from the dropdown menu:

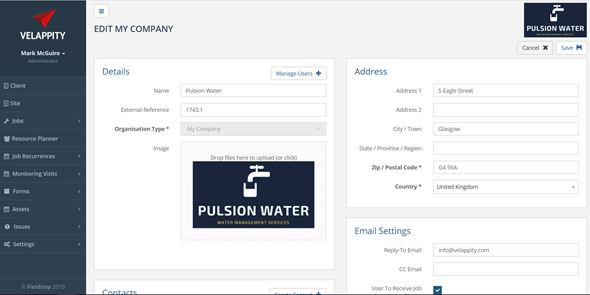
You will then be taken to the “Edit My Company” section:
Editing My Company
To edit the “My Company” page, click on the “Edit” button at the top right of the page:
You will be able to edit the different subsections of the “My Company” section.
In the “Details” subsection, you can enter details of the company. The “Name” field is the name of the company, the “External reference” is a string of letters and numbers used to identify the company. It must be unique from other external references within your organisation and is used for systems integration purposes.
The “Organisation Type” field will automatically be set to My Company and won’t be able to be changed. The “Image” field is usually the company logo or a picture for the company, this is displayed at the top right of the page. The image can be any common image file type such as a .png or .jpg file.
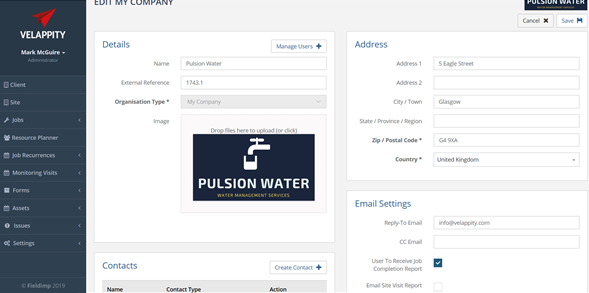
The “Address” subsection contains all the information about where the company is located, the user should populate this accordingly.
The “Documents” subsection is used for adding any relevant documents for the “My Company” section. To add a document, the user should click on the “Add File” button in the top right of the “Documents” subsection.
Once clicked, the user will be directed to an “Add New File” page:
![]()
The “Documents” subsection is used for adding any relevant documents for the “My Company” section. To add a document, the user should click on the “Add File” button in the top right of the “Documents” subsection.
Once clicked, the user will be directed to an “Add New File” page:
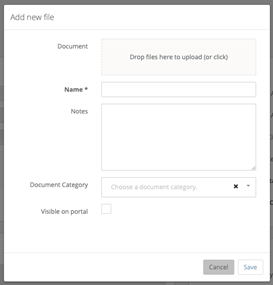
Drag and drop a document to the “Document – Drop files here to upload (or click)” field or click on the field to upload a local file from your machine. The “Name” field is the name that the user wants to give the document and the “Notes” field is for any comments that should accompany the document.
The “Document Category” field is any tags the user wants the document to have. The document will be displayed under these tags in the client portal. If there are no tags added, then the document will be under an ‘uncategorised’ tag. To create a new tag please see the “Document Categories” section of this guide. If the “Visible on portal” checkbox is checked this means the document will be visible to all users on the Client Portal.
Once the user has finished uploading the document and filing in the fields, the user should press the “Save” button at the bottom right of the “Add New File” page. Alternatively, if the user wishes to discontinue with this process, the user should press the “Cancel” button at the bottom right of the “Add new File” page.
In the “Language & Time-Zone” subsection there is only one field, “Time-Zone”. The user should choose the appropriate time-zone and language for their company from the dropdown menu.
To change the “Email Settings” for their company and set up “Contacts”, the user should see the “Automatic Emails” section of this guide.
If the user is happy with all the information that they have provided, the user should click on the “Save” button at the top right of the “My Company” page. Please note that if the user wants to set up auto-emails for job completion reports and site visit reports the user should stay in the edit state on the page.